1. Prerequisites Checklist
Before you begin, ensure you have everything you need. This interactive checklist will help you verify that you're ready to proceed with the setup.
-
Ansible installed on your local machine.
-
An Ubuntu 22.04+ EC2 instance is running.
-
Your EC2 instance's IP address is bound to `git.openml.dev` in Route 53.
-
SSH access to the instance with a key pair.
-
Developer's public SSH key is available.
Here's the command to create an EC2 instance:
aws ec2 run-instances \
    --image-id ami-00271c85bf8a52b84 \
    --count 1 \
    --instance-type t3.small \
    --key-name testKey \
    --security-groups git.openml.dev \
--tag-specifications 'ResourceType=instance,Tags=[{Key=Name,Value=git.openml.dev}]'2. Build & Run the Playbook Command
Enter your specific details into the fields below. The command will be generated for you in real-time, reducing the chance of typos. Once complete, just click to copy.
For multiple keys, paste each one on a new line.
ansible-playbook -i git.openml.dev, --user=ubuntu --private-key=</path/to/your/key.pem> -e "git_public_key='<your_public_key>'" setup_git_server.yml3. Create Your First Repository
After the playbook succeeds, SSH into your server and run these commands to create your repositories. Note that the `git` user must have ownership of the parent directory to be able to create new repositories within it.
A. SSH into your instance:
ssh ubuntu@git.openml.devB. Create the parent directory for your repositories and change its ownership:
sudo -u git mkdir -p /home/git/OpenML && sudo chown git:git /home/git/OpenMLC. Create a symbolic link for a cleaner URL (Optional):
sudo ln -s /home/git/OpenML /OpenMLD. Initialize a bare git repository:
sudo -u git git init --bare /home/git/OpenML/my_new_repo.git4. Clone Your New Repository
Finally, you can clone the repository to your local machine. The command below will be updated with the domain you provided earlier. Now you're ready to start pushing code!
git clone git@git.openml.dev:OpenML/my_new_repo.gitGraphical Interfaces
`git.openml.dev` makes use of open source community tools without re-inventing the wheel. Although `git.openml.dev`'s native environment is in the terminal, a visual representation is sometimes what we need.
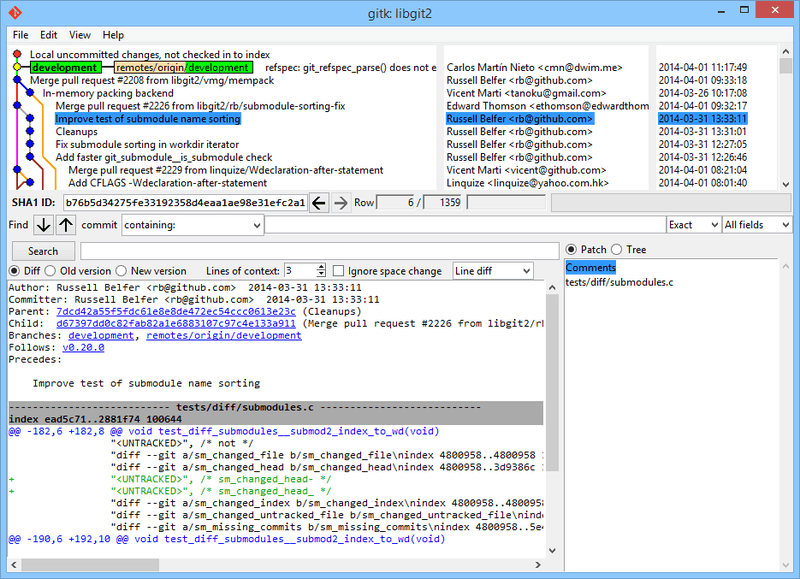
gitk
`gitk` is a graphical history viewer. Think of it as a local GitHub pull request code-view or IDE git GUI interface. This is the tool to use when we are trying to visualize the `git diff
gitk [git log options]Gitk accepts many command-line options, most of which are passed through to the underlying `git log` action. For example one of the most useful is the `--all` flag, which tells `gitk` to show commits reachable from `any` ref, not just HEAD. Gitk's interface looks like this:
git-gui
`git-gui`, on the other hand, is primarily a tool for crafting commits. It is the equivalent of executing `git` from IDE GUI buttons. It, too, is easiest to invoke from the command line:
git guiAnd it looks something like this:
